A Slightly Less Intolerable PHP Dev Environment with Vagrant and Chef
Let’s get one thing out of the way: I am not a PHP guru. I have however, wrestled with PHP in attempts to put my own stamp on my WordPress theme. Given my general lack of day-to-day PHP engagement, the first challenge in redesigning this site’s theme was figuring out what on earth I was using for a development environment the first time around. Some digging on the old MacBook revealed that the answer was MAMP. I fired up the MAMP app, hit ‘Start Servers’, and … nothing happened.
In a previous life I might have resigned myself to a few hours of turning the knobs on Apache and MySQL. After 3+ years of port install whatever, curl http://whizbang.org/install.sh | sh, and vanilla building from source, my veteran MacBook is somewhat cluttered. Apparently I never get around to make uninstall.
Enter Vagrant
Lately at work, I’ve been using Vagrant to sandbox my per-project development environments onto their own VMs. Vagrant is a tool to help create and provision VirtualBox machines. The short list of reasons why this is a good idea:
-
The development environment can be isolated from all the other junk that accumulates on my primary computer.
-
The development environment can be tuned to match a production server environment as closely as possible.
-
Provisioning scripts define the machine configuration in code. This means the configuration is repeatable and versionable.
Getting started with Vagrant is easy. All you need is ruby, the gem command line tool, and Virtualbox. The latest-and-greatest Vagrant requires Virtualbox 4.0.x, which you can grab over here. If you need more information for Ruby and RubyGems, you may want to check out the links on Vagrant’s getting started page.
Once you have those dependencies, install the vagrant gem:
$ gem install vagrant
Next, download a ‘base box’. This command fetches the base box for Ubuntu 10.04 (32 bit):
$ vagrant box add ubuntu-lucid-32 http://files.vagrantup.com/lucid32.box
This downloads the base box and stores it at /~/.vagrant/boxes, and you can then reference it locally with vagrant as ubuntu-lucid-32 or whatever you decided to call it.
Project Setup
I have both my rb2.0 WordPress theme and my vagrant configuration in a repository laid out like this:
-repeatingbeats.com/
  -rb2.0/
    -comments.php
    -footer.php
    -functions.php
    -header.php
    and so forth ...
  -vagrant/
    -cookbooks/
The first step is to initialize the vagrant folder:
$ cd /path/to/repeatingbeats.com/vagrant
$ vagrant init
This creates a default Vagrantfile that is helpfully commented with various configuration options. The Vagrantfile uses Ruby code to configure the virtual machine. Here’s what my Vagrantfile looks like for the WordPress project:
Vagrant::Config.run do | config |

  # Use our base ubuntu box
  config.vm.box = "ubuntu-lucid-32"

  # Forward port 8080 on the host to port 80 on the VM
  config.vm.forward_port "http", 80, 8080

  # Map project source folder to VM
  config.vm.share_folder("repeatingbeats.com",
                         "/var/www/wordpress/wp-content/themes/rb2.0",
                         "../rb2.0")

  # Provision with chef solo
  config.vm.provision :chef_solo do | chef |
    chef.cookbooks_path = "cookbooks"
    chef.add_recipe("repeatingbeats.com")
  end

end
This configures the VM to use the ubuntu base box, sets up port forwarding so I’ll be able to view the WordPress site from a browser on the host machine, shares my WordPress theme’s source folder with the VM, and configures Chef Solo to manage the server provisioning.
Chef, Cookbooks, and the Metaphor Really Just Keeps Going
Chef is a server configuration management tool. Server configuration (e.g. packages, services, directories, users, etc.) is described in code. It would take a full blog post to describe the small subset of Chef that I have thus far uncovered, so just head over to the Chef Wiki if you want to learn more.
A closer look at the vagrant folder:
-repeatingbeats.com/
  -vagrant/
    -Vagrantfile
    -cookbooks/
      -apache2/
      -mysql/
      -openssl/
      -php/
      -repeatingbeats.com/
      -wordpress/
Uhoh. This is starting to look like a lot of work! Each cookbook directory contains instructions (ahem … “recipes”) for configuring that aspect of the server. Luckily, most of the work was already done for me and I merely had to fork the Opscode cookbook repository to get everything except the custom repeatingbeats.com cookbook.
The repeatingbeats.com cookbook ties it all together. It’s only a single file: cookbooks/repeatingbeats.com/recipes/default.rb
# Optional packages that I like to have installed
%w{vim man-db git-core}.each do | pkg |
  package pkg
end

# Run apt-get update before the chef convergence stage
r = execute "apt-get update" do
  user "root"
  command "apt-get update"
  action :nothing
end
r.run_action(:run)

include_recipe "wordpress"
The wordpress recipe does the heavy lifting. It installs apache2, mysql, and php, and it drops a WordPress install at a default location of /var/www/wordpress on the VM. Conveniently, my shared theme source folder lands in exactly the right spot: /var/www/wordpress/wp-content/themes/rb2.0.
Hello WordPress (Can I See My Site Already?)
Everything is now ready to go. Let’s start the VM:
$ cd /path/to/repeatingbeats.com/vagrant
$ vagrant up
Don’t hold your breath. The startup and provisioning can take some time. Once it’s done, you can ssh into the new VM to poke around with a simple:
$ vagrant ssh
If you’re playing along at home, you should be able to find the WordPress folder in /var/www/wordpress, and you can ps to your heart’s content to verify that Apache and MySQL are up and running.
I Meant In a Browser
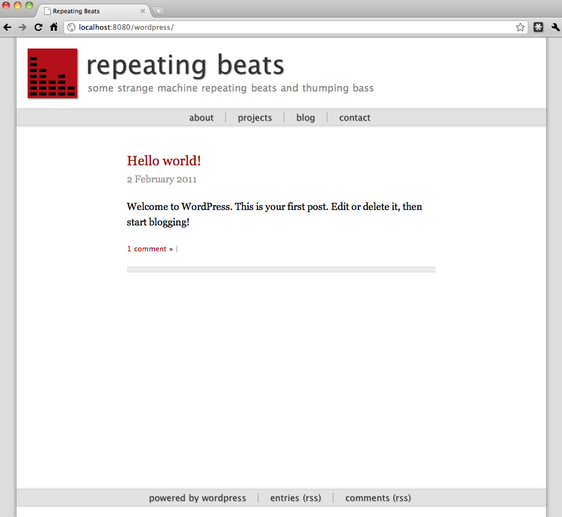
Ok! Open up your favorite browser and navigate to the WordPress install page at http://localhost:8080/wordpress/wp-admin/install.php. You should be able to quickly finish the install, configure the admin user, and get logged in to the admin page. Click ‘Appearance’ in the left navigation column, and your fancy theme should be listed as one of the available themes. Click ‘Activate’, then go to the home page at http://localhost:8080/wordpress. Here’s what I see:
But Didn’t This Seem Like a Lot of Work?
Admittedly, this probably didn’t save much time in terms of initial environment setup. I probably could have cajoled the MacBook into running WordPress with a comparable level of effort.
However, what about the next time I want to tweak the site? All I need to do is clone my repository and run vagrant up. I’m right back into my development environment with no effort at all.
If I want to blow it up and start over, I just write a new Chef recipe. If I’m on another machine, I can get right into the same environment just as easily once I’ve obtained the minimal dependencies for Vagrant. No need to mess with Apache and MySQL just to test some changes to the footer.
As an added bonus, I got to do this on my MacBook:
$ port uninstall php5